The enrolment process generates a number of fees against the learner. You can select these fees to be included in an invoice.
From the Invoices tab, you can:
To create an invoice, select the required fees in the Fees grid and then click the Invoice Selected button on the Payments ribbon.

The Invoices tab is displayed.
The invoice number is system-generated and includes an optional prefix that is set by the Prefix for Invoices institution setting on the Fees and Payments screen.
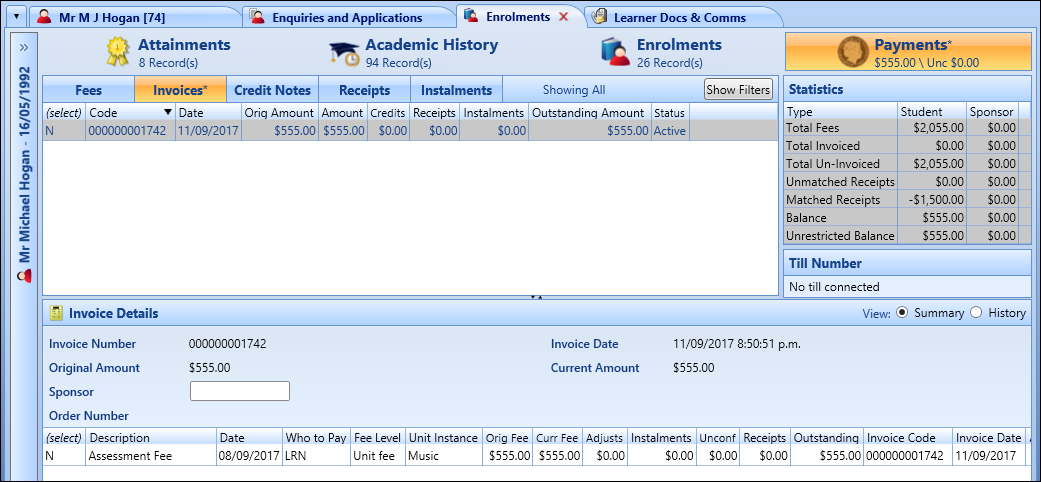
The invoice is created but not been paid, and you can then pay the invoice as required.
-
Select the required invoices in the Invoices grid, and then click the Pay Selected button on the Payments ribbon.

The Enrolments Receipt window is displayed.
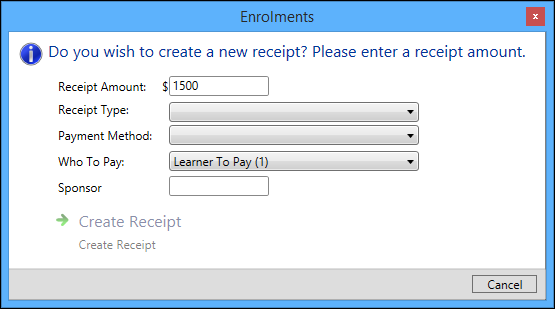
The Receipt Amount and Who To Pay fields are automatically populated with the fee details. You can change these, if required.
- Enter the required details in the available fields.
The fields on the Enrolments Receipt window are described in the following table.
| This field | Holds this information... |
|---|---|
| Receipt Amount | The amount required to pay. This is automatically populated from the details entered for the fee. |
| Receipt Type | The receipt type. Select from the drop-down list. |
| Payment Method | The payment method. Select from the drop-down list. |
| Who to Pay | The person/company/institution responsible for paying the fee. This is automatically populated from the details entered for the fee. |
| Sponsor | If you selected a sponsor value in the Who To Pay field, enter the required sponsor code. Alternatively, click the Search button to display the Sponsor Search window, where you can select the required code. |
-
Click the Create Receipt button to confirm the changes.
The receipt record is created. See Create Receipts for more information.
Invoices can be manually capped for international learners, Standard Domestic fee type payers, and those with a fee type of Domestic FCR. When an invoice is capped, the system automatically recalculates the GST accordingly.
Invoice caps are represented as a reduction in the invoice amount, rather than an increase in the amount of credit that has been applied against it. The invoice amount of a capped invoice remains the sum of the current fee amounts of the fees with which it is associated; therefore the cap reduction is reflected in those fees.
The cap amount is displayed in the Adjusts column on the Fees tab and the Invoice Details section of the Invoices tab, but not in the Credits column on the Invoices tab.
To cap an invoice:
-
Select the required invoice in the Invoices grid, and then click the Cap Invoice button on the Payments ribbon.

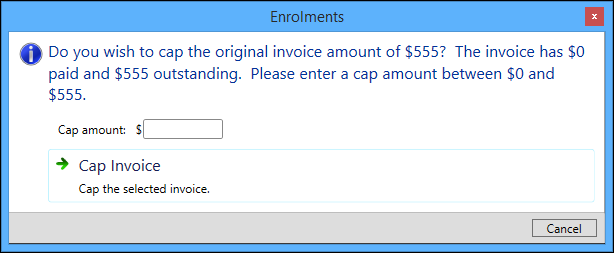
The Cap Invoice window is displayed.
-
Enter a cap amount between $0 and the original invoice amount.
You can cap the invoice at any amount up to the full amount of the original invoice.
-
Click the Cap Invoice button.
The system will adjust the invoice amount by adjusting the fee records which make up the invoice, to the difference between the original fee and the capped amount.

-
Click Save.
When you save your changes, the Amount and Outstanding Amount columns for the invoice will update to reflect the capped amount, and you can then pay the invoice.

To cancel an invoice cap:
-
Select the required invoice in the Invoices grid, and then click the Cancel Cap button on the Payments ribbon.

A message is displayed.
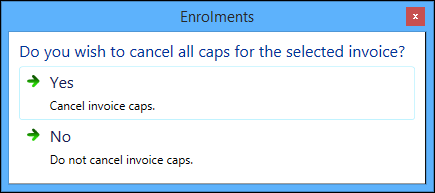
- Click Yes to confirm you want to cancel the invoice cap.
-
Click Save.
The invoice cap is cancelled, and the system restores the invoice amount, and the fee amounts under that invoice, to their original values.
If there are receipts matched to the fees associated with the capped invoice, then when the cap is cancelled, those receipts remain matched to those fees. If the fee amounts have increased then they display as being part-paid.
You can split an invoice into a reduced amount owed by the existing debtor, and a new invoice owed by a different debtor, to enable the fees to be paid jointly by two different entities.
Splitting an invoice is a one-way process. When an invoice split has been saved, the two invoices are separate and cannot be joined again without cancelling them, regenerating the original fees, and then re-invoicing.
Changing one of the following fields will recalculate the other fields, so that all four fields remain synchronised:
- Percent (%) to Retain
- Percent (%) to Reallocate
- Amount to Retain
- Amount to Reallocate
The amounts and percentages apportioned across the individual fee lines in the grid are also recalculated automatically.
You can adjust the amounts to retain and reallocate for each fee manually in the grid. This invalidates the contents of the global fields displayed above the grid. Use the Recalculate Fees button to discard any individual fee-line adjustments and return to apportionments calculated from the global fields.
If splitting an invoice reduces the amount of one or more fees for the original debtor below the total amount of the receipts matched to those fees, the system suggests re-matching them, starting with the oldest non-StudyLink receipt, through to the newest non-StudyLink receipt, then the oldest StudyLink receipt through to the newest StudyLink receipt.
You will be then shown the amount of each receipt that would be matched to each fee, the total amount of each receipt and the unmatched amount of each receipt. You can then adjust the matching information manually before saving. The unmatched amounts display is kept synchronised with the adjustments automatically.
The total amount matched to fees cannot be increased above the total amount of the receipts. The total amount matched in respect of any one receipt cannot be increased above the total amount of that receipt. Any receipt amounts left over after matching remain against the learner as unmatched payments.
To split an invoice:
-
Select the required invoice in the Invoices grid, and then click the Split Invoice button on the Payments ribbon.

The Invoice Details section displays the following fields.

The fields in the Invoice Details section are described in the following table.
| This field | Holds this information... |
|---|---|
| Invoice Number | The system-generated invoice number (read-only). |
| Invoice Date | The current system date and time (read-only). |
| Invoice Due Date | The date that the invoice is due to be paid. |
| Original Amount | The original amount of the fee (read-only). |
| Current Amount | The current amount of the fee (read-only). |
| Who To Pay | The person/company/institution responsible for paying the fee. Select from the drop-down list. |
| Sponsor | If you selected a sponsor value in the Who To Pay field, enter the required sponsor code. Alternatively, click the Search button to display the Sponsor Search window, where you can select the required code. |
| Percent (%) to Retain | The percentage of the invoice to retain. |
| Amount to Retain | The amount to retain. |
| Percent (%) to Reallocate | The percentage of the invoice to reallocate. |
| Amount to Reallocate | The amount to reallocate. |
| Order Number | The order number of the invoice. |
-
Click Save.
When you save your changes, this will:
- Adjust the amounts of the fees associated with the existing invoice to the new amounts specified against each in the relevant fields of the screen
- Rematch any receipts matched to the fees associated with the existing invoice according to the specifications
-
Create new fee lines in respect of the amounts to be split out
The amounts and ‘Who to pay’ of these fees are as specified in the relevant fields of the screen. New fees are not generated in respect of fees where the amount to be split out is zero.
-
Invoice the newly created fees
The system saves the new invoice automatically, it does not wait until the next manual save.
If an invoice has been created by mistake, then you can cancel the invoice so that another invoice can be created containing additional fees from further enrolments. An invoice cannot be cancelled if it has been fully paid.
The process of cancelling an invoice creates an internal audit trail to show that a credit note has been raised. This data can be used to print a credit note and/or send the relevant information to the finance system.
To cancel an invoice:
-
Select the required invoice in the Invoices grid, and then click the Cancel Invoice button on the Payments ribbon.

A message is displayed.
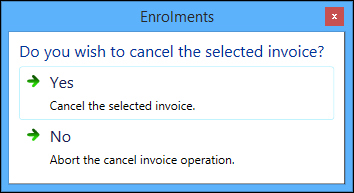
- Click Yes to confirm you want to cancel the invoice.
-
Click Save.
The invoice is cancelled, and the original invoice displayed in the Invoices grid with the status of ‘Cancelled’.

You can record an order number against invoices raised against organisations, to help organisations match their invoices to their orders when they receive them.

To print an invoice, select the required invoice in the Invoices grid, and then click the Invoice button in the Reports group of the Payments ribbon.

The invoice is automatically sent to your default system printer.

